
Introduction
Papermaking is an easy, enjoyable activity that produces such varied results. Paper slurry can be used to make standard sheets of paper, but it can also be formed into unusual shapes and used as a sculptural material. It is a very practical way to think about office and school waste as the paper produced is often a more beautiful, valuable art material than the waste paper it is made from. Papermaking takes up quite a bit of space, you will need an area to dry the paper and access to water and a drain is very helpful.
Materials
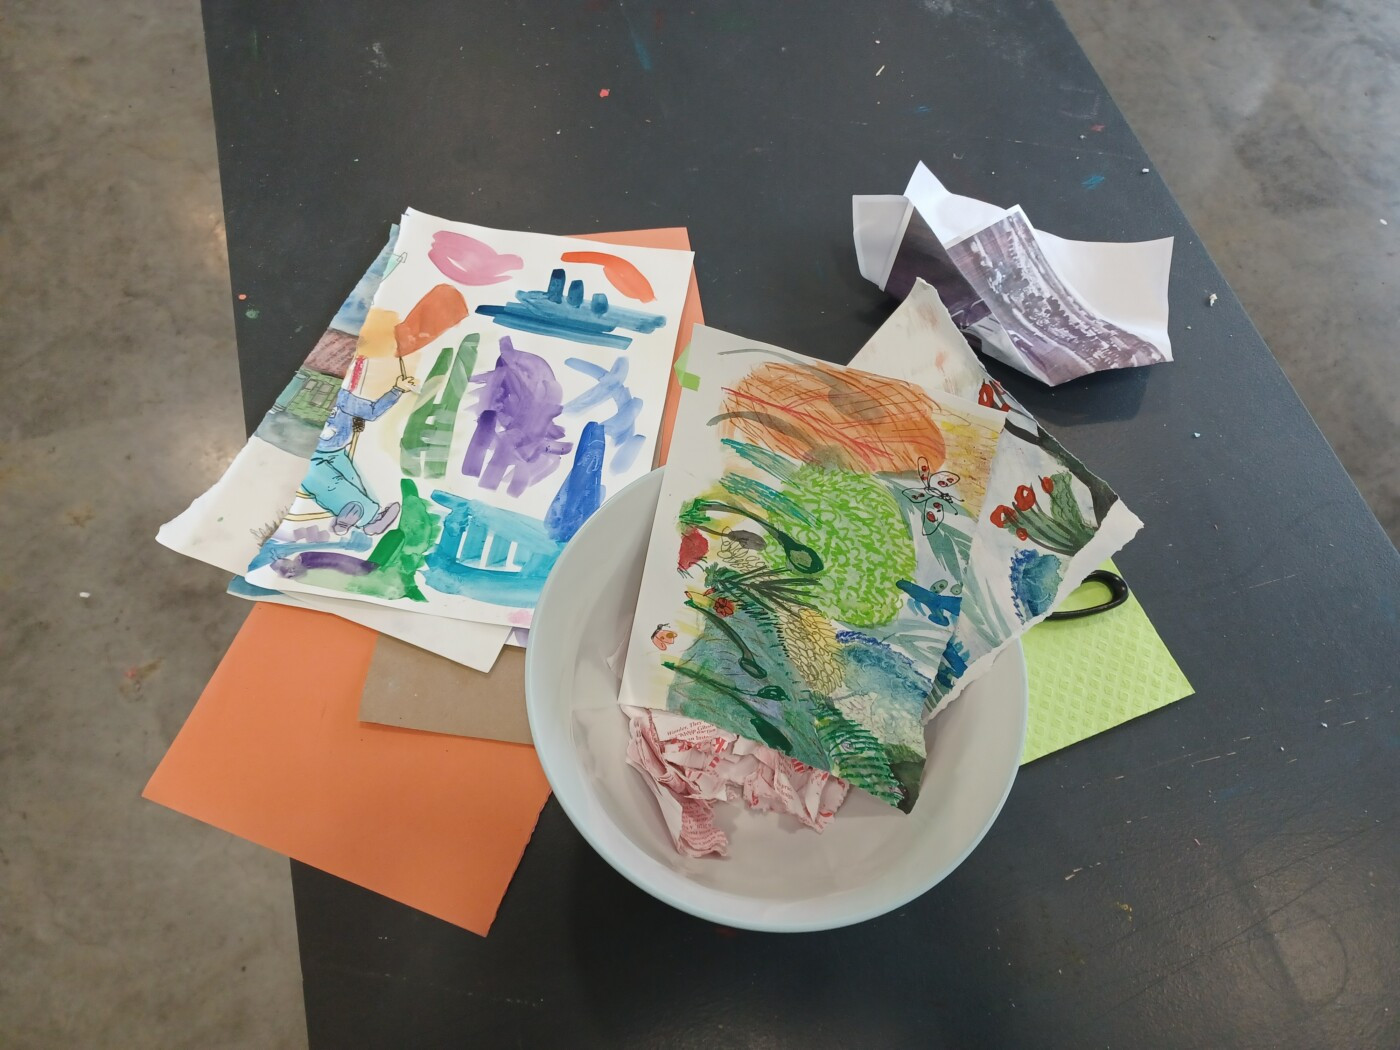
- Collection of “used” pages/ waste paper/ cardboard/ old drawings/ packaging
- Water (access to a sink is useful for this process)
Equipment
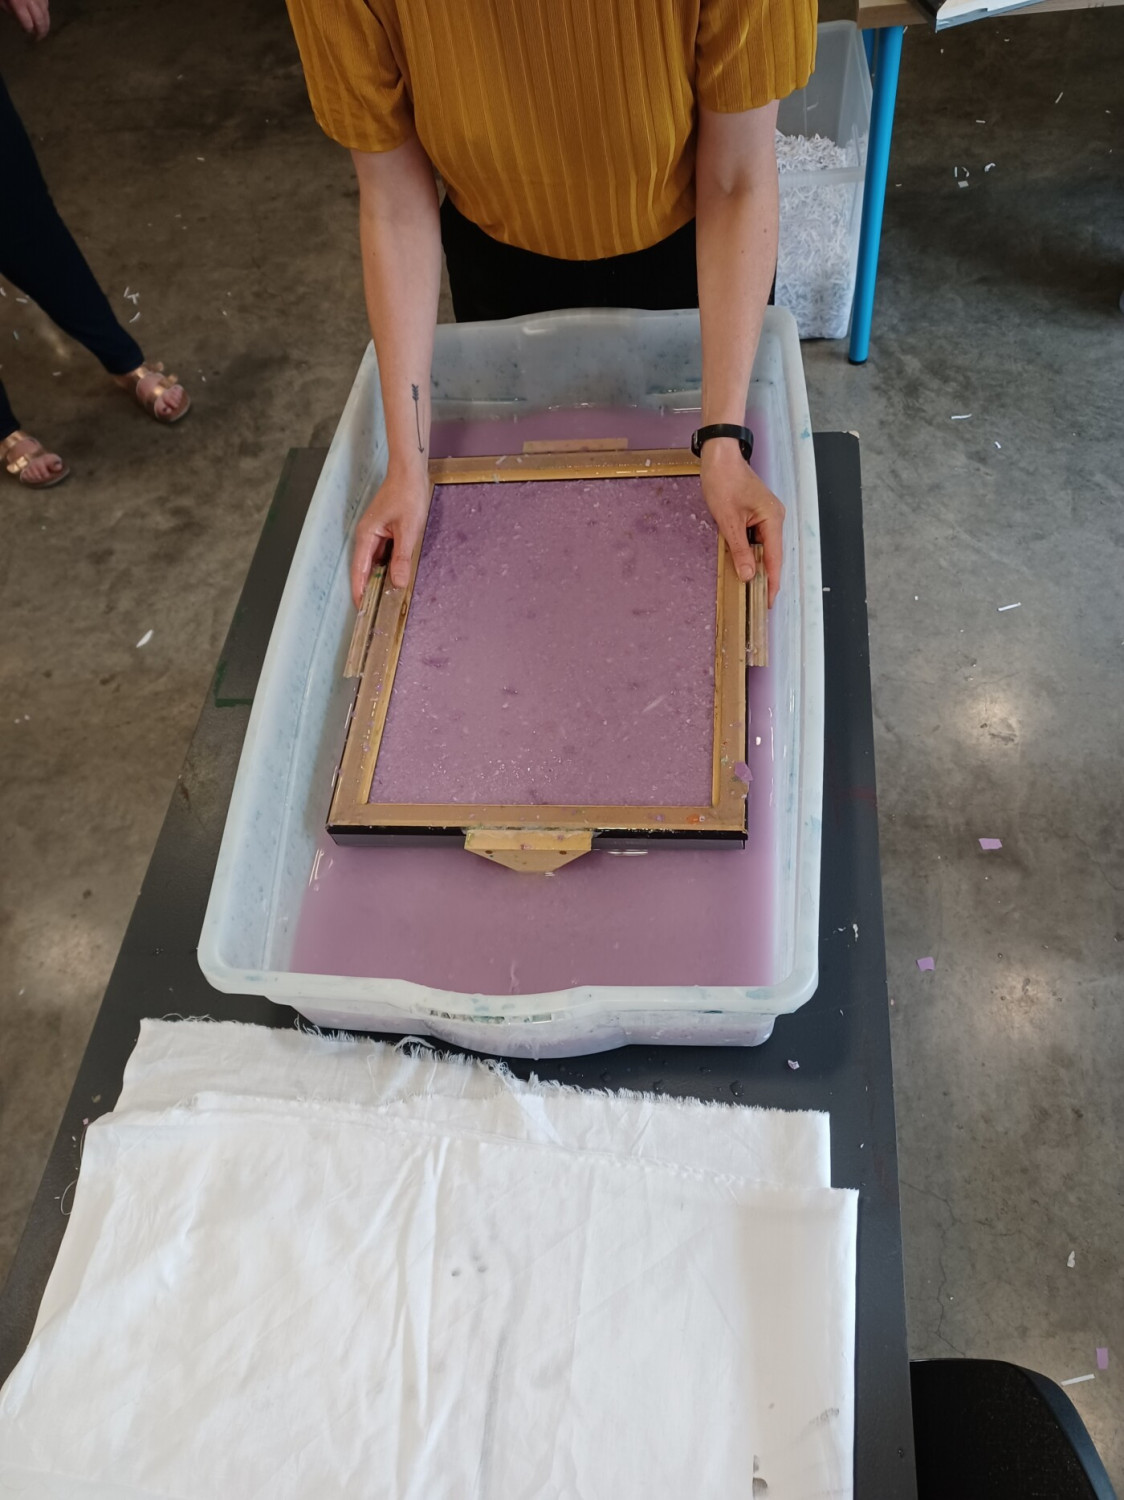
- Papermaking screen and deckle (these can be purchased or improvised)
- Large shallow containers for paper slurry (these should be larger than your deckles)
- Sieve
- Bowl
- Paper shredder (optional)
- Blender (handheld or standing)
- Old rags and towel
- Fabric sheets, for example an old bedsheet but into pieces slightly larger than the deckle
- Sponges or rags
- Heavy pieces of board, for example mdf/ plywood etc. slightly larger than fabric sheets (optional)
Method
-
Choose the paper waste you would like to use, if you’re using coloured paper, or something that is already printed, such as magazine pages, flecks of these colours will show up in your paper. Tear your paper up finely or use a shredder, transfer this paper into a bowl and cover with water. Allow the paper pieces to soak until they have softened (could be overnight) and can easily be broken up with your hands. Use quite a few sheets, the more paper you use, the more paper you can make.
-
Blend the softened paper in batches, take care not to damage your blender, this is called paper slurry. You can blend this very finely or leave flecks and lumps of larger paper, it’s up to you. Add the blended slurry to your large, shallow container. Add extra water to the vat, the more pulp to water the thicker your paper will be. Mix up the water and slurry so it is evenly distributed. Run your sieve through the water and see if a thin layer of paper slurry catches in the sieve, this means there is enough paper slurry distributed to make some sheets.
-
You’re now ready to “pull” a sheet of paper. Stir up the container so the slurry is distributed evenly. Hold the screen mesh-side up and place the deckle (frame) on top. Hold them tightly together and at a 45degree angle, lower them into the water and scoop up the slurry, bring the mould and deckle up through the water, leveling the mould out horizontally as you bring it to the surface. As you lift the mould and deckle above the container, give it a quick shake back and forth to even out the surface of the slurry and let the excess water drip out.
Method 1 for drying
-
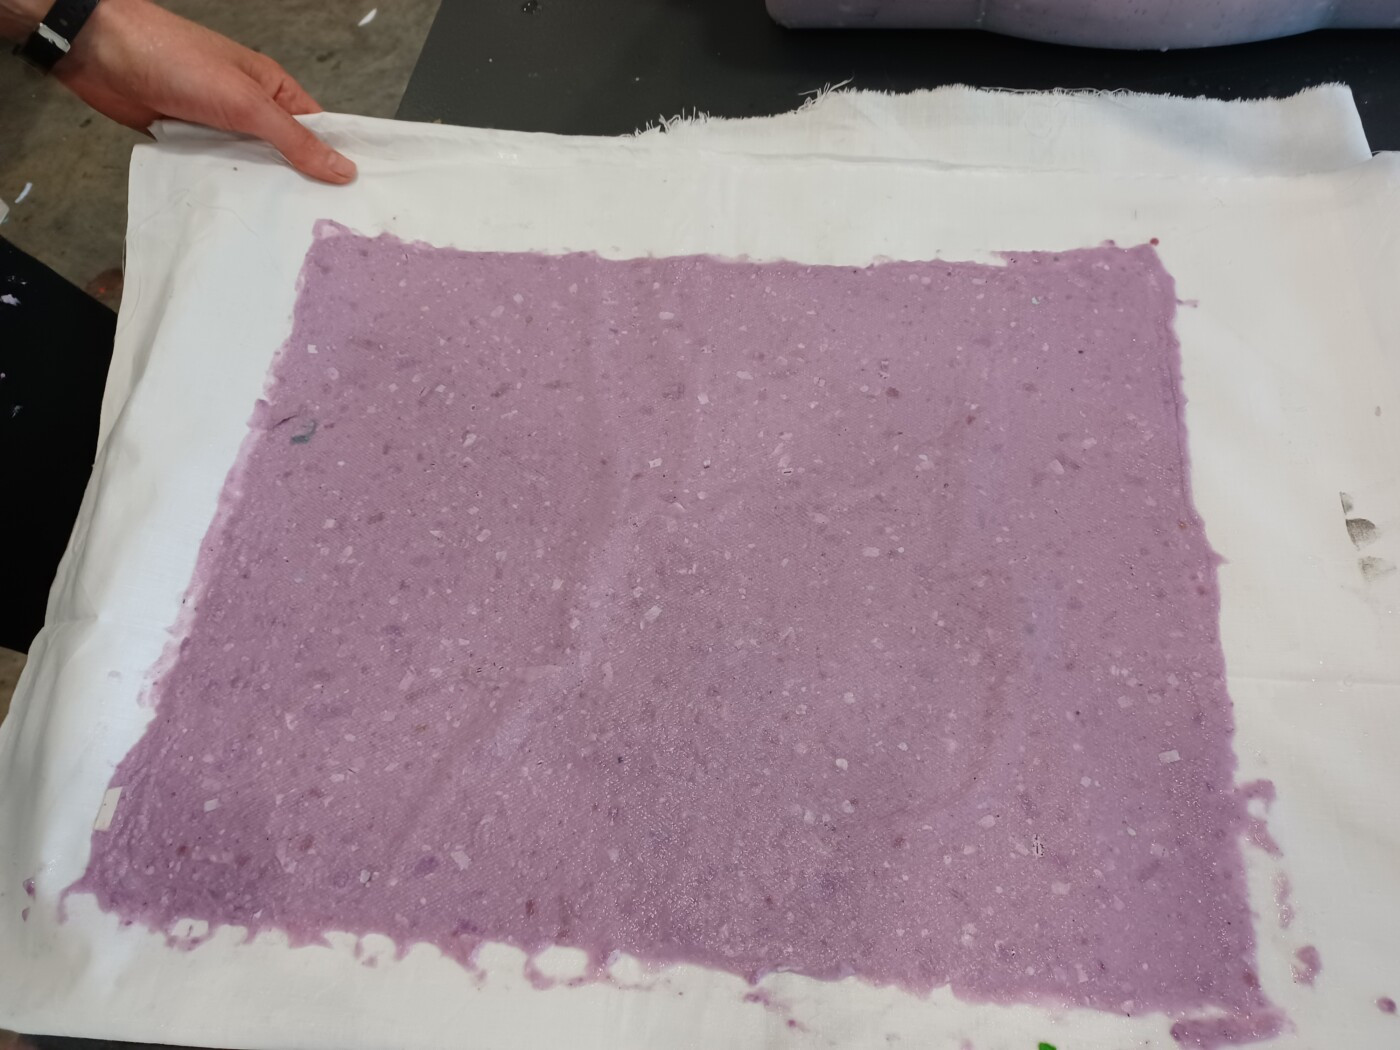
The next step is called couching (pronounced coo-ching!), lay one fabric sheet out with a towel underneath. When most of the water has dripped off the mould and deckle, remove the deckle (frame) then flip the screen over quickly, onto the fabric, the paper slurry will be in direct contact with the fabric. This motion should be like closing the cover of a book.
-
Using a sponge, press off the excess water from the back of the screen, remove the sceen carefully, place a new sheet of fabric on top of the paper slurry. This is called "pulling a sheet".
-
Repeat the process of couching “pull” a pile of sheets. These paper sheets will be stacked with a sheet of fabric between each one.
-
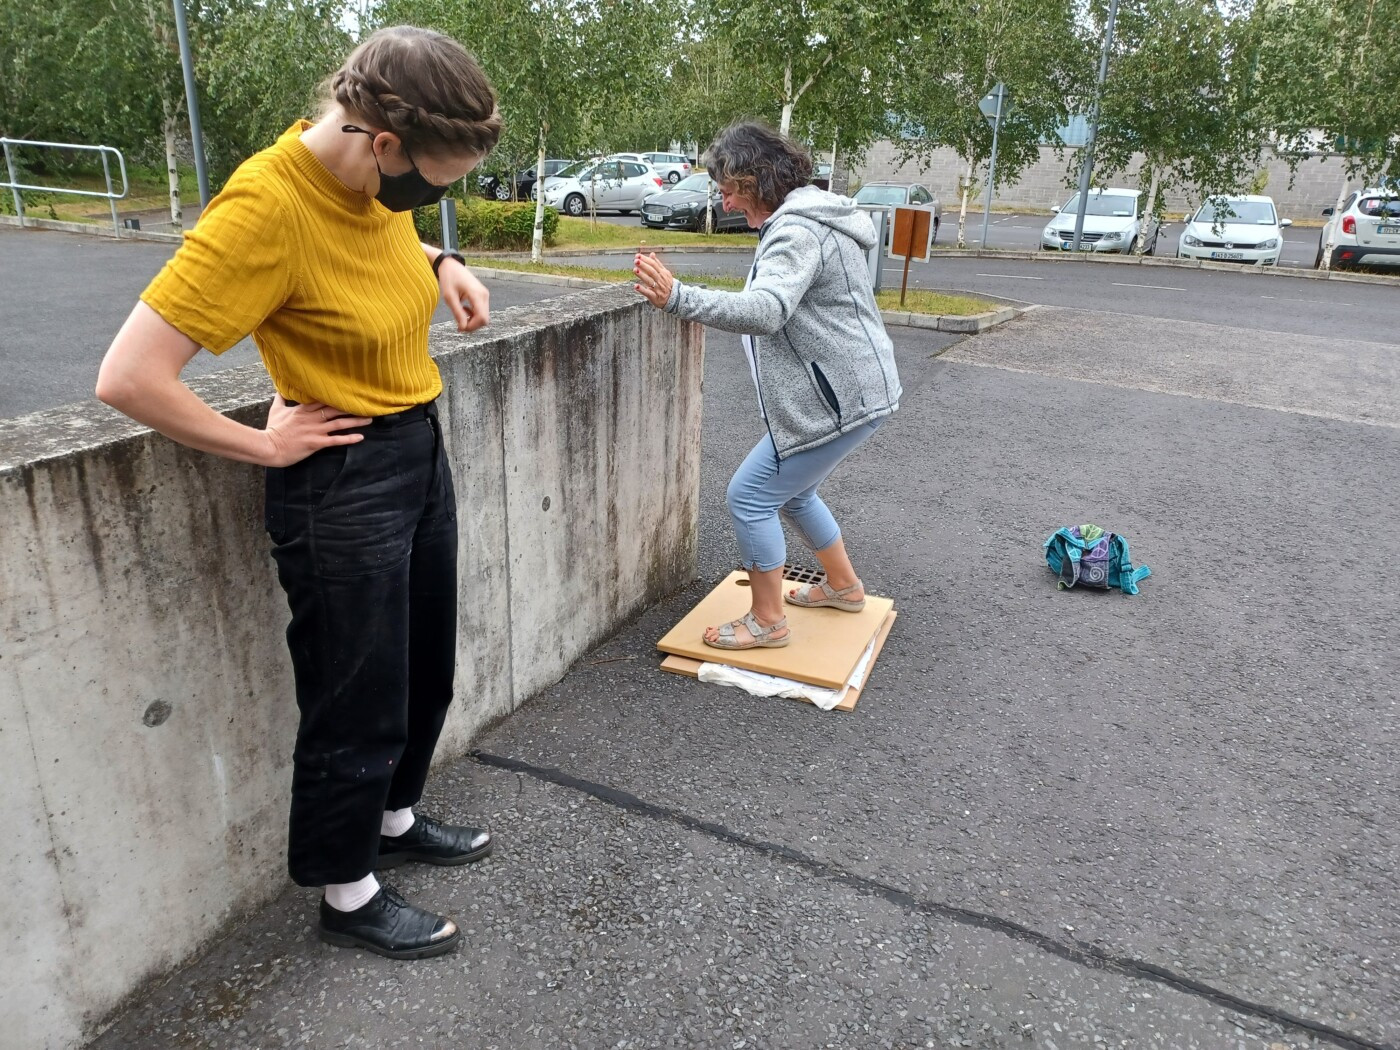
Place a towel on top of your stack of paper and fabric and place your board on top of that. Put this stack on the floor, ideally outside, and stand on the stack, this will squeeze out most of the excess water. (You’ll need a mop if you can’t do this outside.)
-
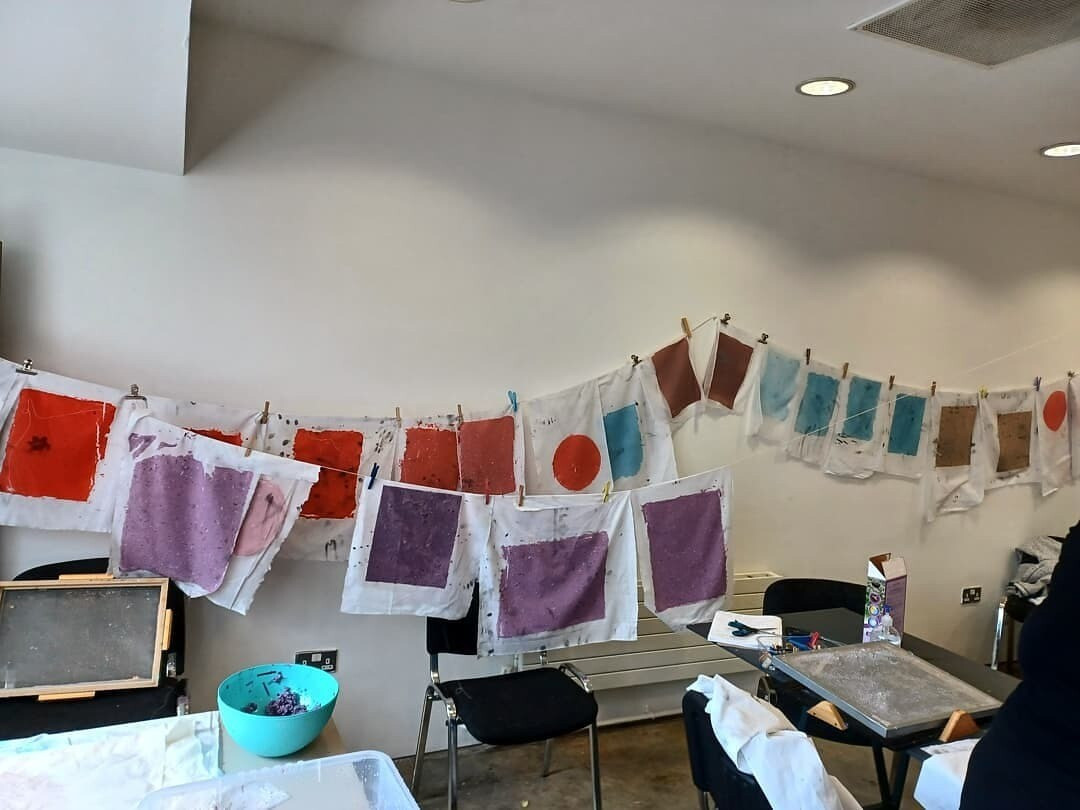
Hang these sheets with paper pulp on a line to dry.
- When they are completely dry, the paper sheet will lift off the fabric easily.
Method 2 for drying
- You can press the pulp straight out against a window to dry, or press it out on an mdf board. When most of the water has dripped off the mould and deckle, remove the deckle (frame) then flip the screen over quickly, onto the mdf board, the paper slurry will be in direct contact with the mdf. This motion should be like closing the cover of a book. Squeeze off the excess water with a cloth.
- When the paper is completely dry, it should be easy to remove from the boards and stack and flatten them with a board and something heavy on top.
Notes
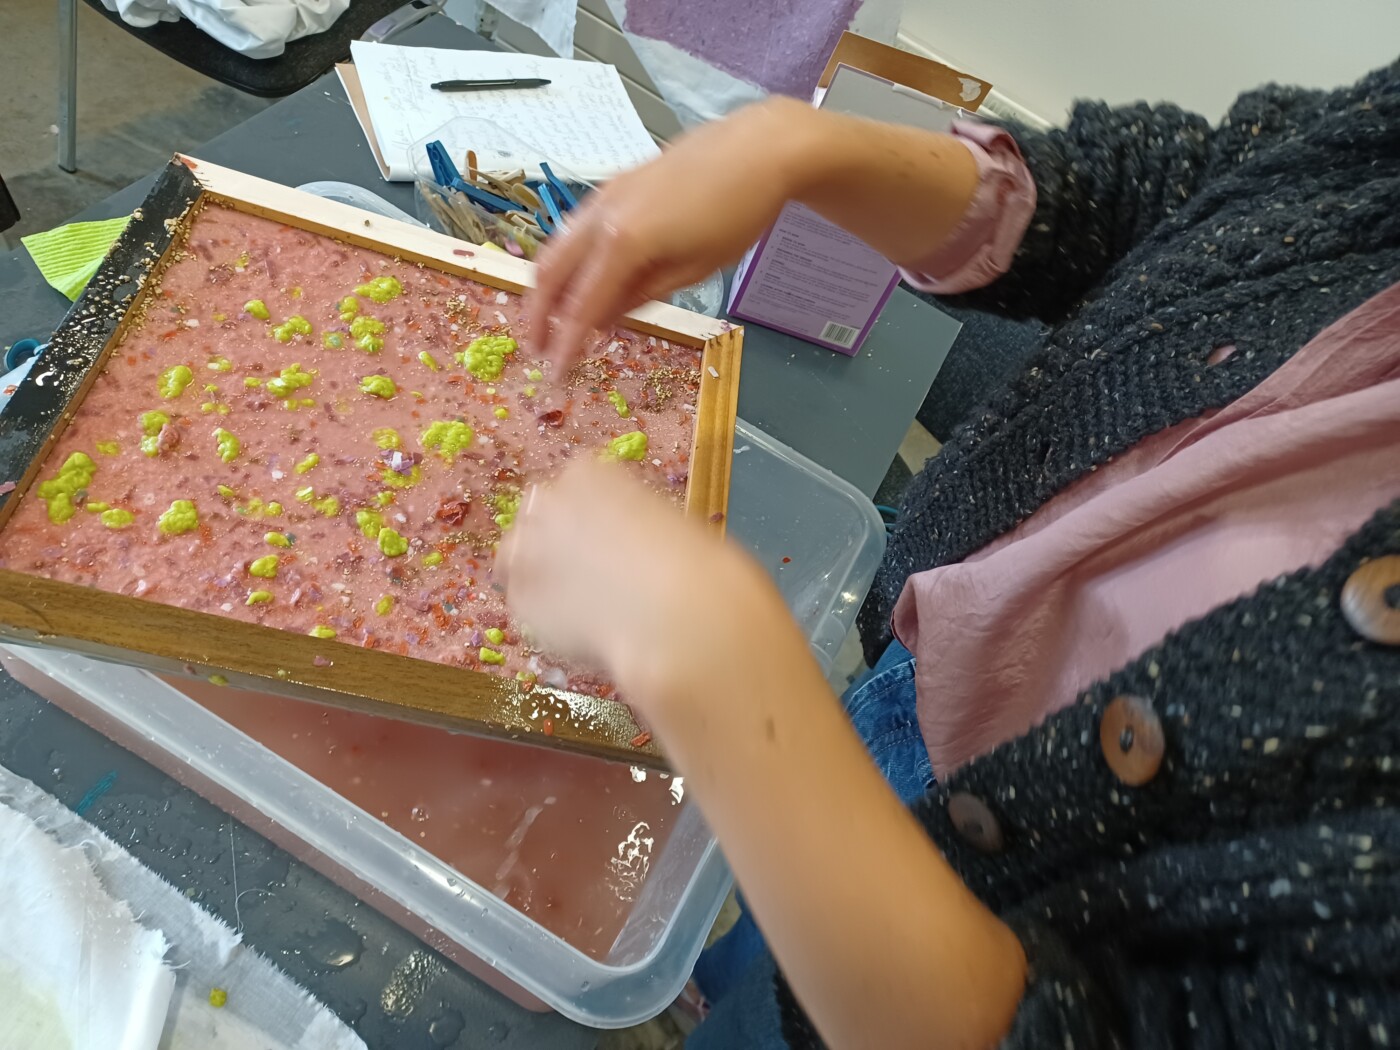
When you have learned this basic technique, you can experiment with various materials, adding seeds, petals, unprocessed pieces of paper, multiple colours and making freeform shapes. The paper becomes a sculptural material when manipulated in these ways.